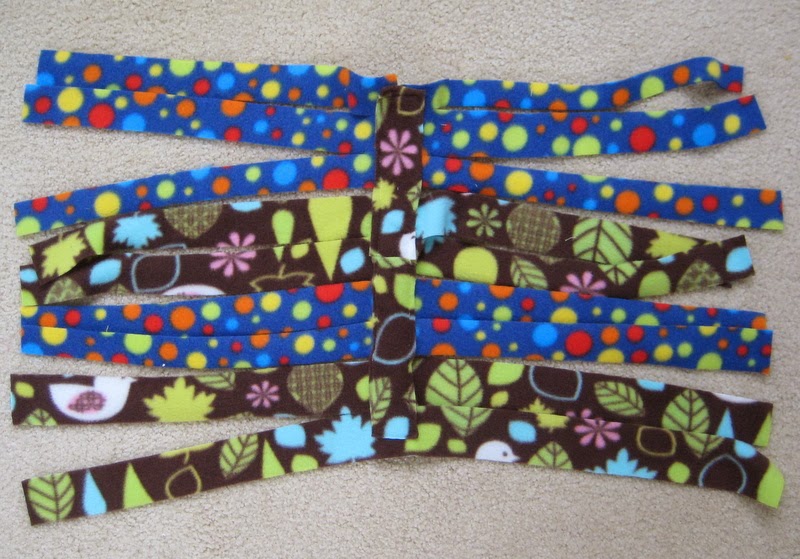
The original fleece forest instructions don't require any sewing. However, this version does. The lovely thing about fleece is that the raw cut edges don't fray, so there's no worry about turning under edges or having a wide seam allowance.
 | |
| Click photo to enlarge |
Most of the strips were the whole width across (about 27"). Others, like the wide bit of blue at the top were shorter - a little over 13" long. I joined them to make a long piece using the spine to hold the two sides together. The photo on the left shows the stitching from the underside of the spine, as well as where I joined my two pieces of blue fleece together.
The strips of fleece were wider than the holes of the grid. After I sewed it all together, I used an extra grid to mark where I needed to cut the strips, so that they'd fit through the grids. I cut each strip up to the spine, making sure I didn't cut through the spine or the stitching.
I had only enough scraps to make one strand of forest. But that little bit has met with approval. It's Pinniped and Cannoli's favorite spot to eat hay. The food bowl has been dragged behind it as well. Pinni especially likes to poke her nose through it and will occasionally sleep underneath. Cannoli prefers to sleep behind it, so that she's completely hidden.
Now I know what to do with my skinny pieces of leftover fleece!


Great way to put all those leftover scraps to use! Will have to try this someday when I take up sewing.
ReplyDeleteThat is a good way to use up the fleece! I laughed about the nose poking through and the food bowl being dragged behind it. Our baby pig, ~3.5 months old now, loves to haul thatch houses into her fleece forest. I am sure, when she's big enough, the food bowl will make it's way over there as well. It's amazing how much pigs love simple little strips of fleece!
ReplyDelete