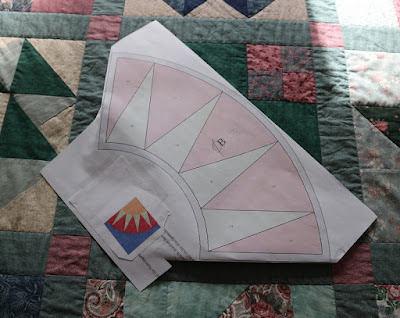
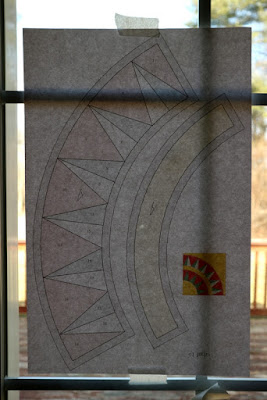
Ulla's New York Beauty patterns are for eight-inch blocks. That many blocks on a queen sized quilt was a bit daunting. Then my sister showed me the design she liked, I decided to enlarge the patters to be 12-inch blocks. That was easier said than done. The math was easy - enlarge the pattern by 150%. After that I kept hitting problems. Turns out my printer can't handle printing to a page that big. Rob had access to a printer that could handle it, but then couldn't get any of the software to simply print a PDF file at 150%. He did the heroic thing, pulled up all the pages in some software, resized each page to the correct size, and saved it all in one big PDF. And then printed them (they fit on tabloid sized paper, if you're interested). Yay! I have printed patterns.
 They were so big! But when I compared the pattern pieces to the blocks on my quilt I could see they really would create a 12-inch block. They wouldn't look so enormous on the bed.
Next hurdle - I have patterns, but they weren't printed to freezer paper, which is my preferred paper-piecing method. I had cut a bunch of 11x17" pieces of freezer paper before I discovered you can't run them through a laser printer... not without the risk of them melting to the drum. Well, bummer.
 |
| Traced copy, original copy, acetone transferred copy |
As I was researching if here was a way to do that I stumbled across something called acetone transfer (Google it - there's a bunch of videos/how-tos). By placing the laser printed page print-side down over another piece of paper, then covering it with acetone and pressing it, the print will transfer to the second sheet. So I gave it a try.
As you can see, I got some of the print to transfer, but as I expected (it's not as faint in person). I tried on two or three sheets. The fumes were quite strong. This would be a good outdoors project - but obviously not this time of year.
 |
| Cut/folded pieces, freezer paper to cut, and original printed patterns |
So where do I go from here?
Well, the advantage of printing it to the freezer paper is that I can use it three times before the wax runs out of stickiness. Which means all tracing and folding gets a few uses before I'd need to do it again. I'm considering for the big pieces, though, to just print a few of them, and stitch right through. Disadvantage - I need to do the creasing on multiple copies. It's all a trade-off.
At this point, I think I need to use each pattern 4-5 times to make enough blocks for the quilt. It might be nice if I could scrounge up another pattern or two, or maybe mix-and-match the pieces to these to add another design or two.
This quilt has been an adventure so far and I don't even have the fabric yet.
Sharing with Freemotion by the River's Linky Tuesday.


That does sound like quite an adventure! What colors does your sister want her quilt to be? I'll look forward to seeing how this quilt develops!
ReplyDeleteGosh, that is a lot of working out but will be a fabulous quilt to sew, though. The circles draped over the edge of the bed will look great.
ReplyDeletewhew
ReplyDeletethats going to be lots of work. I only make these paper pieced
This is going to be gorgeous. Yay for Rob's tech skills and access to a larger printer! Funny you should mention the laser printer and freezer paper. I just replaced my old inkjet because no amount of maintenance would get it to print properly anymore. The last straw was printing a paper piecing pattern and having some of the lines missing. So I proudly came home with a laser printer...then remembered I couldn't use freezer paper in it. Oops!
ReplyDeleteI have a solution for those of you who want a giant sized paper piecing solution. There are giant, flat light boxes that can be used for this now. I use one for my applique pieces. I used to have one that was 12x8, my current one is 24x36 tabletop size. I can trace on it quite efficiently instead of having to find a sliding glass door and the correct angle of sunlight to trace the lines to. Oddly enough, even though I do freezer paper applique, I use permanent fine point magic markers in black on my lines. Your ability to paper piece points is wonderful. I don't do those, but admire those that do. Good luck with your project.
ReplyDelete