
I finally replaced my old ironing board. It needed a new cover and
it was set up in the living room all the time - so I wanted to replace it with
a real piece of furniture. This has been my goal for many, many
months. A little over two weeks ago we picked up a console table that
was much too short, although it looked like I could modify it. Some wood, varnish, batting and fabric and voila!

It's not a work of art, but I'm quite pleased with the results.

First we built three sides of a six-inch box to sit on top of the base. I moved the the cross piece from the table to be the fourth side of the box.
I cut dowels and filled the holes where the cross piece used to be attached to the base.
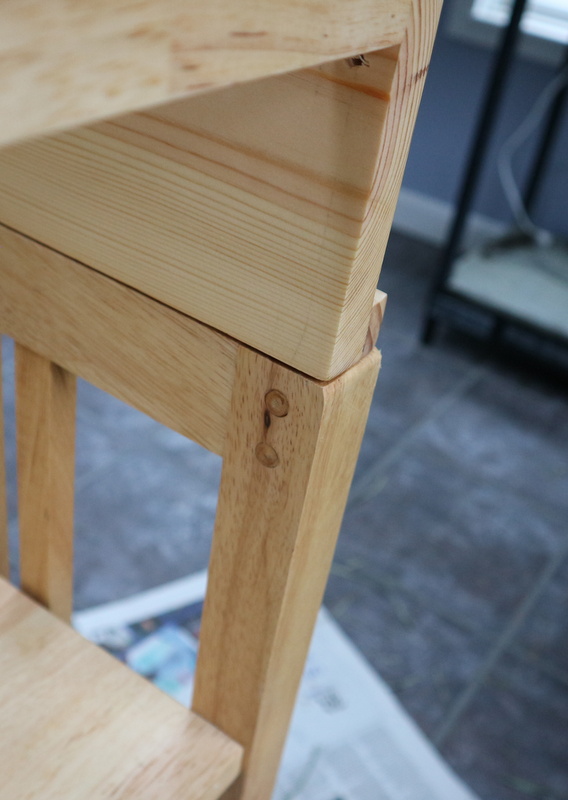

We attached the box to the back of the table with the original table
hardware. I wanted to use the same hardware to attach the front, but it was too complicated with the tools I had on hand. Instead we attached the front with a pair of brass plates. (Wow - it doesn't look
straight in this photo, but it really is.) I had hoped to hide this bit of hardware, but as you can see from the first photo, the plates blend in.

The table top was the size I wanted - wide enough to iron a width of fabric and not too deep. Perfect! I needed to raise the height of the table, but it didn't require a piece of plywood enlarge the top.
The tutorials I read all differed in how to cover the table top. Some started with
a layer of tinfoil, some with insul-bright, others went straight for
batting. Most instructed to staple everything to the board, including the fabric. Another had a 2½-inch deep top, so they fitted the batting and added a drawstring cover. Lots of options!
I decided to go with the insul-bright/batting
combo. First I stapled the insul-bright directly to the table top, then
cut two layers of cotton batting slightly larger and stapled them next.
I liked the drawstring approach to the cover. I purchased two types of
fabric to cover it - a heavy canvas (the one in the photos) and a lighter
weight home-decor fabric of dark blue.

I followed the
instructions for Elizabeth Hartman's pressing table cover. I cut it a bit smaller than I'd have liked - I didn't account for the bulk of the fabric nor the overhang of the
batting. Also, I was afraid a larger cover would interfere with the sides of the
table. Additionally, the elastic wasn't quite strong enough to pull the cover
tight. Maybe replace the elastic with drawstring? If/when I make the
other cover, I'll adjust the size for bulk and overhang.

The finished top was then attached to the base: the front with the original hardware and the interior back side with small L-brackets (they were a pain to install!). I tapped in new plugs to cover the screw-in hardware, then slapped on a bit of polyurethane. I'm amusedly peeved that the plugs on the lightest sections of wood turned darkest - they were all the same color before I varnished them! Now I just need to pick up some colored wood putty to fill in the screw holes in the back (or find tiny plugs for them).

Yeah - this isn't an elegant piece of furniture. Rob says when I
tire of this, I can plunk down money to get a custom piece that's exactly what I
want. Maybe. In the meantime, this looks and feels so much better than what I
had. I love the shelf underneath - it's tall enough to store the
iron standing up. The light clips on better to the edge of this than the old
board. It's about an inch and a half taller than what I'm used to - but I did some
research on the ideal ironing board height before I raised the top. This is what's
supposed to be good for me (just shy of 36 inches). It felt great when I tried it out the other
day.
Sharing with:
Love Laugh Quilt - Monday Making
Wendy's Quilts - Peacock Party
My Quilt Infatuation - Needle & Thread Thursday
That looks so great, Sally! I like the shape of the top and the height you made it, too. Nice to have an ironing board that fits in as a piece of furniture! You'll get a lot of use out of this one.
ReplyDeleteSally - fabulous. It adds to your room! Well done to be so handy! It should last you a good, long time!
ReplyDeleteI love this, Sally! Such a great idea! I love the shelf below it. You can store all sorts of stuff down there.
ReplyDeleteWhat a nice pressing station. Nice work! Enjoy ... :) Pat
ReplyDeleteFabulous pressing table. It will be more sturdy too. It is nice to press quilt projects on a rectangular shaped surface as well.
ReplyDelete